Flaskでstyle.cssなどのCSSファイルを読み込ませる方法解説
2024年7月5日

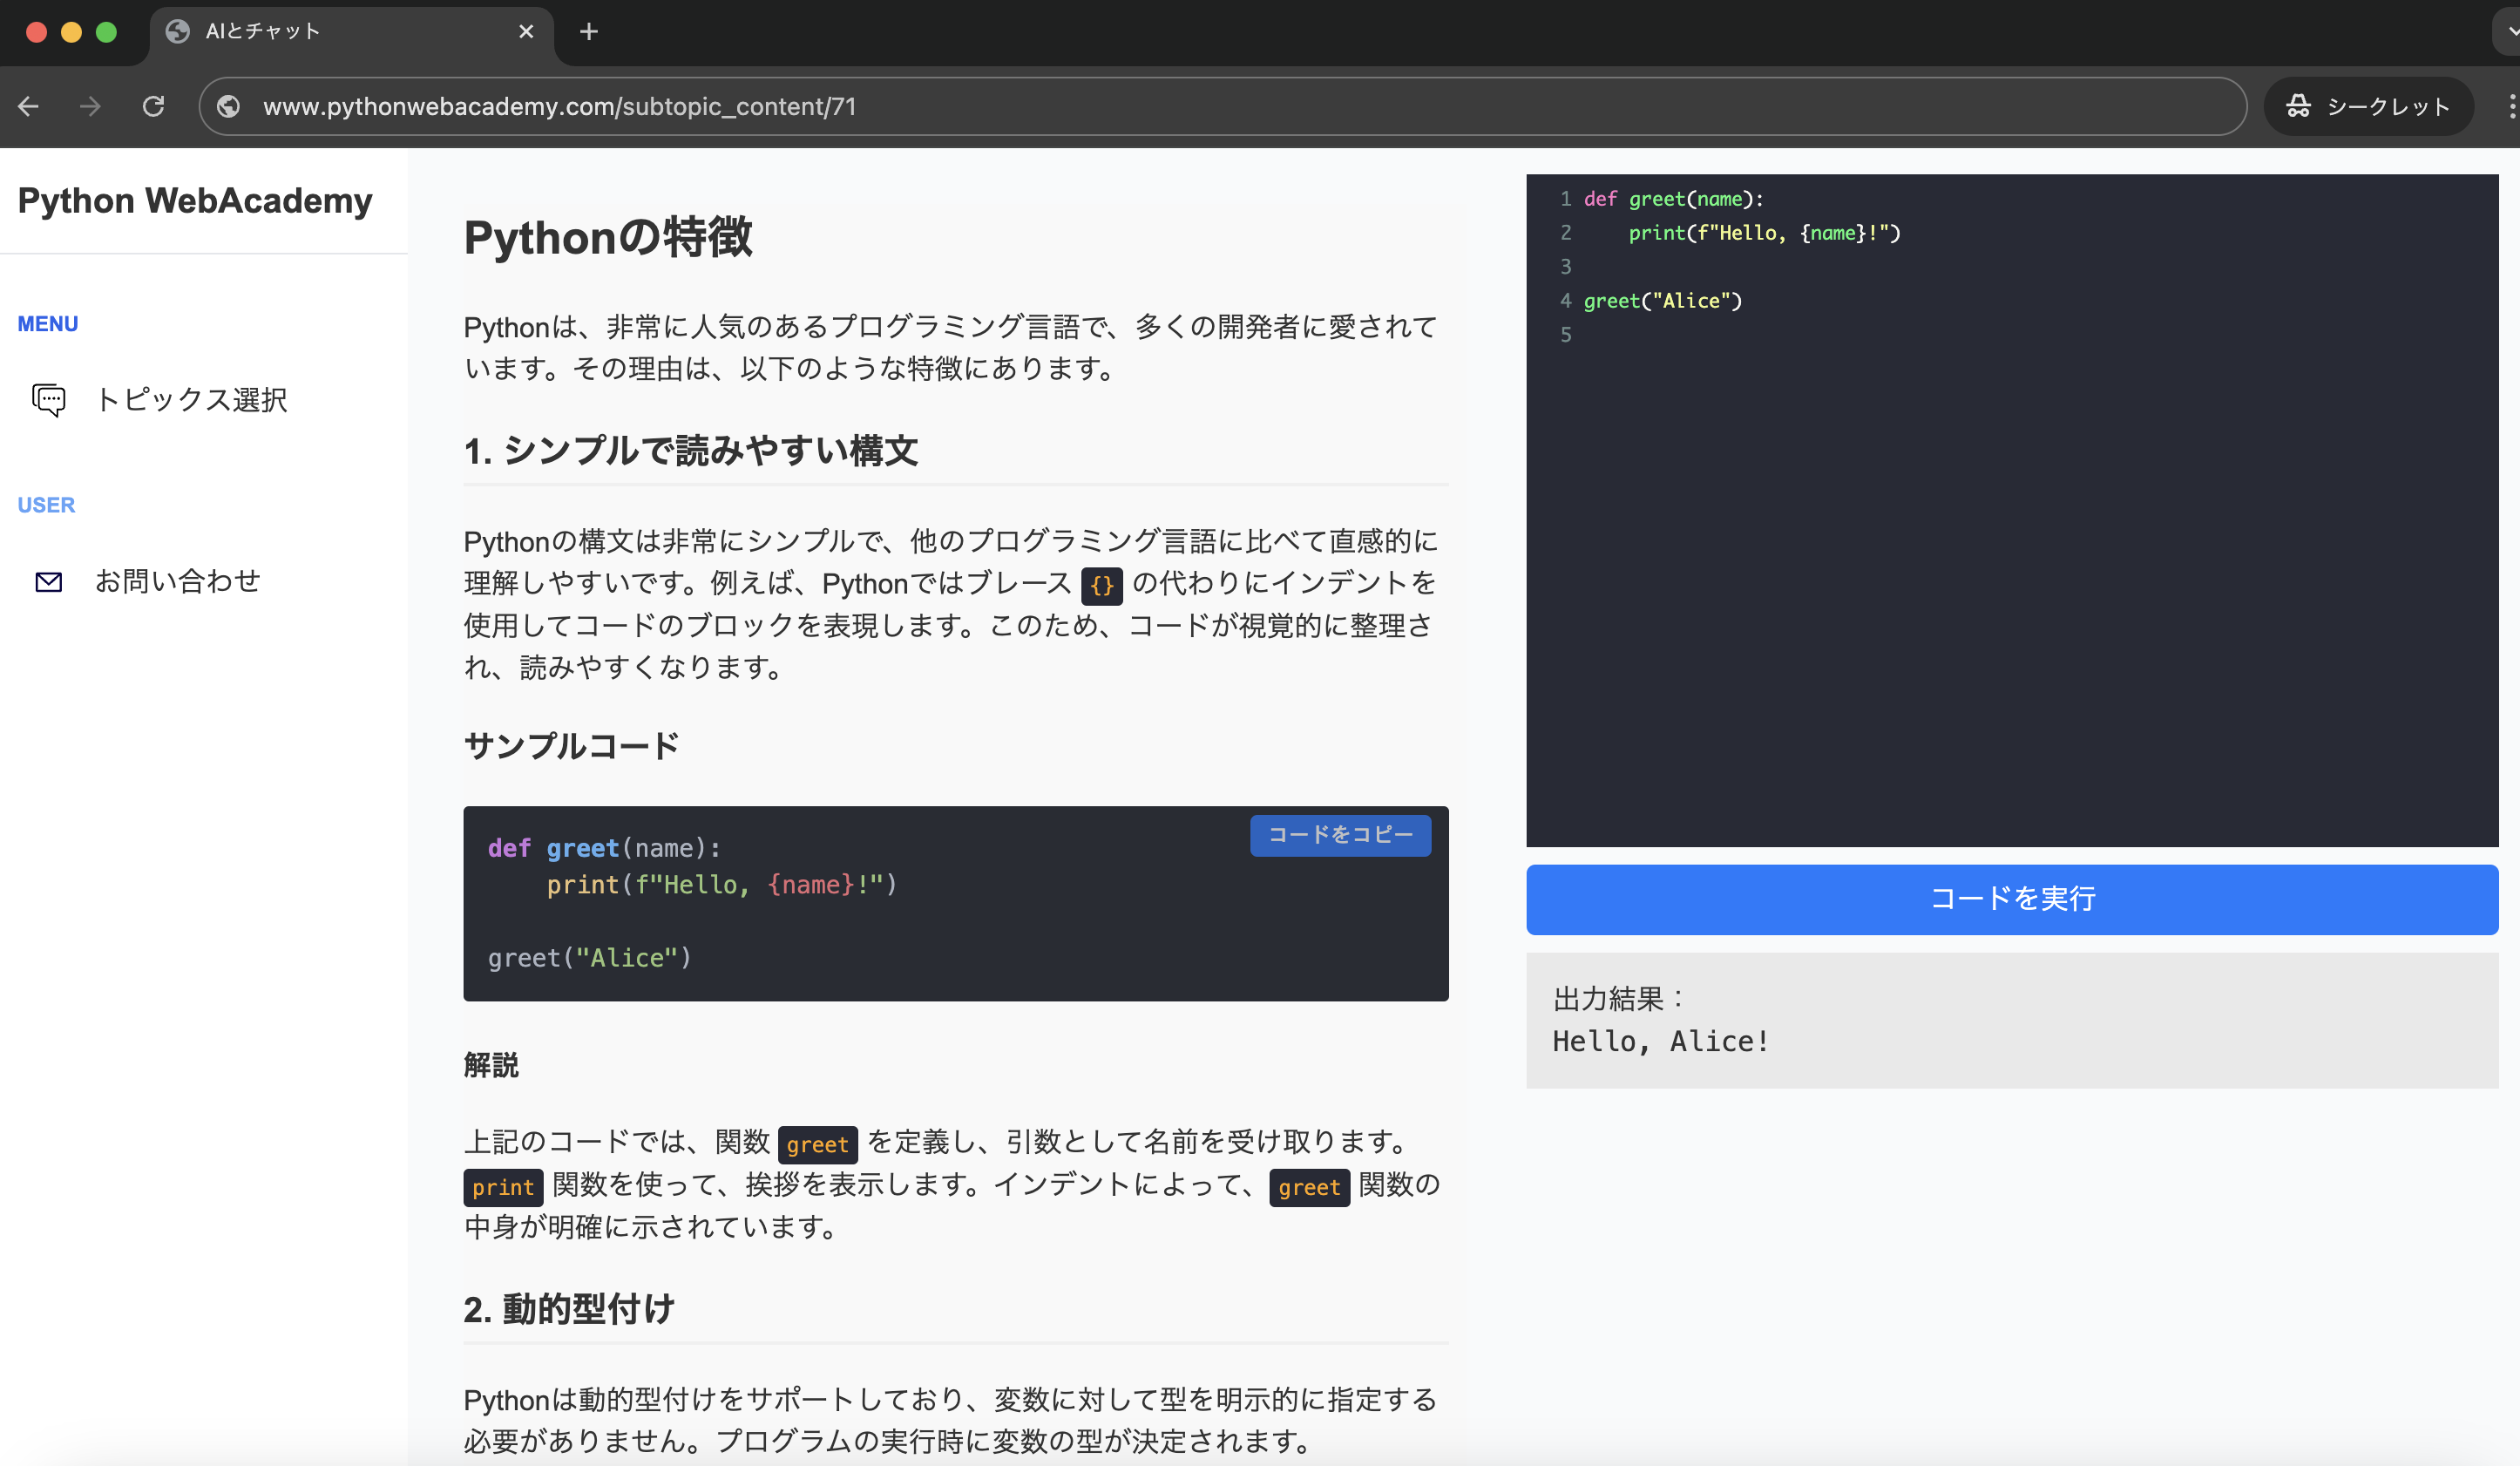
こんにちは。
今回の記事では、PythonのWebフレームワークであるFlaskでStyle.cssなどのCSSファイルを読み込ませる方法について解説します。
Flaskは軽量でシンプルなWebフレームワークの反面、CSSファイルなどは自分で設定する必要があります。今回は、FlaskにCSSファイルを読み込ませる方法を丁寧に説明します。
Flaskのディレクトリ構造
Flaskでスタイルシート(CSS)を使うためには、まずアプリケーションのディレクトリ構造を理解する必要があります。
典型的なFlaskプロジェクトのディレクトリ構造は以下のようになります。
flask_app/
│
├── app.py
├── static/
│   ├── css/
│   │   └── style.css
│   ├── js/
│   │   └── script.js
│   └── images/
├── templates/
│   ├── index.html
│   └── layout.html
└── requirements.txt
注目してほしいのは、staticディレクトリとtemplatesディレクトリです。
staticディレクトリにはCSS、JavaScript、画像ファイルなどの静的リソースが格納されます。つまり、staticsディレクトリは以下にスタイルシートを保存すれば良いのです。
一方、templatesディレクトリにはHTMLテンプレートが配置されます。
FlaskでのCSSの設定方法
FlaskでCSSを設定する方法は、以下の手順です。
1.CSSファイルの配置
2.HTMLテンプレートでのCSSの読み込み
それぞれの手順を詳しく解説します
手順1:CSSファイルの配置
まず、CSSファイルをstatic/cssディレクトリに配置します。今回はstyle.cssを配置します。
このファイルには、ウェブサイトのスタイルに関する記述を行います。
例として、以下のようなstyle.cssを考えてみましょう。
p{
 color: red;
}
上記の例では、HTMLの<p>タグの文字色を赤色にするCSSが記述してあります。
手順2:HTMLテンプレートでのCSSの読み込み
次に、HTMLテンプレートでCSSファイルを読み込みます。
FlaskではJinja2テンプレートエンジンを使用するため、HTMLテンプレートは以下のように記述します。
<!-- templates/index.html -->
<!DOCTYPE html>
<html>
<head>
    <meta charset="UTF-8">
    <meta name="viewport" content="width=device-width, initial-scale=1.0">
    <title>Flask App</title>
    <link rel="stylesheet" href="{{ url_for('static', filename='css/style.css') }}">
</head>
<body>
    <p>Hello World</p>
</body>
</html>
上記の例では、ヘッダー部分の<link rel=”stylesheet” href=”{{ url_for(‘static’, filename=’css/style.css’) }}”>を使用してstyle.cssを読み込んでいます。
この方法を使うことで、Flaskは適切なURLを生成し、ブラウザが正しくCSSファイルを読み込めるようになります。
このような手順でFlaskにCSSファイルを読み込ませます。
テンプレートのjinja2については、こちらの記事で詳しく記述しています。
【関連記事】:Jinja2とは何か?Pythonのテンプレートエンジンについて解説
まとめ
今回の記事では、Flaskでstyle.cssなどのCSSファイルを読み込ませる方法について解説しました。
FlaskアプリでCSSを使いたい方は是非参考にしてください。
今回の記事があなたのWeb開発の助けになれば幸いです。
ここまでお読みいただきありがとうございました。
Pythonの基礎から応用まで学べる
Python WebAcademy
Python WebAcademyでは、Pythonの基礎からアーキテクチャなどの応用的な内容まで幅広く学べます。また、ブラウザ上で直接Pythonコードを試すことができ、実践的なスキルを身につけることが可能です。
 Pythonの学習を始める


インフラの学習はInfraAcademy

おすすめの記事